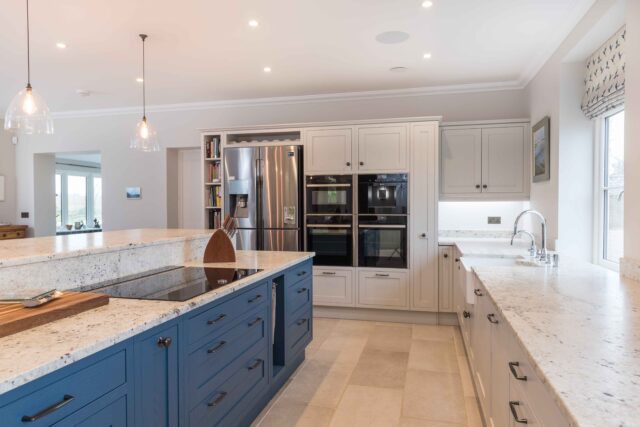
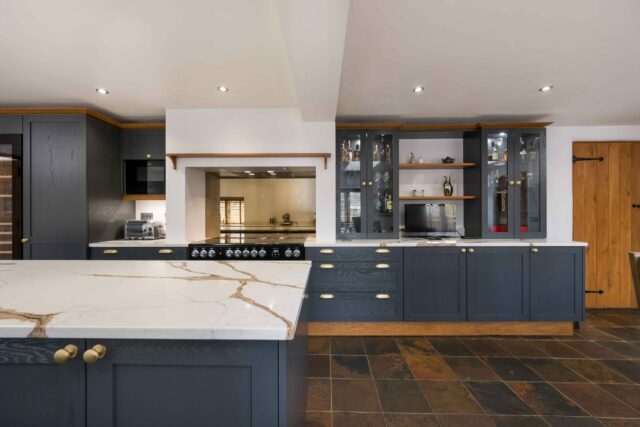
Quartz countertops are a popular choice in kitchens because they look good, resist wear, and are easy to live with. They do not need sealing, they handle everyday spills well, and they come in a wide range of colours and patterns. That makes them practical for busy homes but also stylish enough to suit many designs.
If you plan to fit quartz yourself, it helps to understand the tools needed and the steps involved. At Anglia Kitchens and Bedrooms in Norwich, we often work with quartz as part of bespoke kitchen projects. This is something we can help with, whether you want guidance choosing the right surface or a team to install it for you, so the end result is both practical and built to last.
Getting ready before the slab arrives
Quartz is heavy and not easy to move, so preparation makes all the difference. This stage sets you up for success.
Step 1: Measure with care
Grab a tape measure and note down the full size of your countertop space. Length, depth, and height all matter. If you plan to add a backsplash, measure that too. The slab needs to be at least as big as the area or slightly bigger, so it can be trimmed down.
Mark any cut lines with painter’s tape and pencil. This helps guide you later and stops the quartz from chipping at the edges.
Step 2: Choose your quartz
Once you have the measurements, you can decide on the quartz itself. There are plenty of options, from plain finishes to stone-look patterns. Think about how it will work with your cabinets and flooring.
You also need to pick the thickness. A 1¼ inch slab is standard in kitchens because it is strong without being too bulky. The last choice is the edge. Square edges give a neat look, while curved or waterfall edges soften the style.
If you would like to see different finishes in real kitchens before deciding, you can visit our kitchen showroom in Norwich where quartz is displayed alongside cabinetry and appliances.
Step 3: Prepare the cabinets
Now comes the groundwork. Remove your old counters and leave the bare cabinet frames. Use a level to check that the tops line up. If they do not, slip wooden shims under the frames until everything is level.
If you want to paint, stain, or seal the cabinets, do it now so they are fully dry before the quartz arrives. And remember to turn off the water if you are removing a sink.
Testing the fit and making adjustments
This stage is all about rehearsal. You are checking that the slabs fit, that the sink cut-out is correct, and that your cabinets can hold the weight.
Step 4: Dry fit the quartz
Carefully place the slabs on top of the cabinets. Do not use adhesive yet. This dry fit shows you whether the quartz sits properly.
If you have one slab, check it lines up neatly without leaving gaps. If you have more than one, make sure the seams are even. Place the sink in its cut-out to confirm it sits flush.
If cuts are needed, mark the slab with painter’s tape and pencil. Then cut with a circular saw fitted with a diamond blade. Move slowly and use safety gear, because quartz is both heavy and tough.
Step 5: Fit the sink
Once the slabs are checked, move them to a safe upright position. Then install the sink into its space. Do not hook up the plumbing yet. This is about making sure the sink is supported and ready when the quartz is fixed in place.
Step 6: Add support where needed
Quartz is strong but very heavy. Cabinets usually hold it fine, but some areas like over a dishwasher or in a corner might need reinforcement. In those cases, fix ledger boards to the wall or sides of the cabinets. These act like small shelves that give extra support.
Step 7: Protect the cabinets
Before you glue the slabs down, run painter’s tape along the top edges of the cabinets. This prevents adhesive from sticking to visible surfaces.
Fixing the quartz in place
Now you are ready for the part that transforms your kitchen. The slabs go down, the seams are sealed, and your cabinets finally have their new top.
Step 8: Secure the slabs
Start with the piece that goes around the sink. Run beads of silicone adhesive along the cabinet tops, spacing them 6 to 12 inches apart. With someone’s help, lower the slab into position. Press down gently so it bonds to the cabinets.
Continue with the remaining slabs. If there are seams, place painter’s tape along both sides before sealing. Apply adhesive to the joint, fill it fully, and remove the tape while the silicone is still wet for a neat finish.
Step 9: Let it set
Leave the slabs in place overnight so the adhesive can cure. Avoid using the surface until it has fully set.
Step 10: Finish the sink and plumbing
Once the quartz is solidly in place, connect the sink plumbing and turn the water back on. At this point, your kitchen is functional again.
Living with quartz after installation
Once the slabs are in place, quartz is one of the simplest worktops to look after. Day to day, a quick wipe with warm soapy water is usually enough to keep it clean. Gentle cleaning is all it needs to hold its finish.
Quartz is durable, but it is still wise to protect it from direct heat. Putting a trivet under very hot pans will stop thermal shock and help the surface stay in good condition.
Unlike granite or marble, quartz never needs sealing. Because it is non-porous, it naturally resists stains and does not absorb liquids, which makes it practical for busy kitchens.
Anglia Kitchens and Bedrooms can help
Installing quartz yourself is possible, but it takes planning, tools, and teamwork. Many people prefer to leave it to a trusted kitchen company who can manage the process from start to finish.
At Anglia Kitchens and Bedrooms, we design and install quartz worktops as part of our bespoke kitchens, bedrooms, and bathrooms. Our Norwich showroom is open if you would like to see quartz in person, compare styles, and talk through the best options for your home.
FAQs
What do you put under quartz countertops?
Quartz sits directly on top of your kitchen cabinets. In some cases, plywood or ledger boards are added under weak spots, like above a dishwasher, to give extra support.
Do quartz countertops need to be glued down?
Yes. Silicone adhesive is used to secure the slabs to the cabinet tops and to bond seams together.
How do you secure a quartz worktop?
Quartz is secured with adhesive beads spaced along the cabinet frame. Seams are filled with color-matched resin or silicone for strength and a clean look.
Can quartz crack easily?
Quartz is very strong and resistant to everyday use, but sudden impacts or placing hot pans directly on it can cause cracks. Using chopping boards and trivets helps avoid damage.
What is the downside to quartz countertops?
Quartz is heavy, so it needs strong cabinets for support. It can also be more expensive than some other materials. Direct heat can cause damage, so hot pans should not go straight on the surface.
Does quartz need sealing?
No. Unlike granite, quartz is non-porous and does not need sealing at any stage.
Should you be able to see seams in quartz countertops?
Yes, but with professional installation they are usually minimal and color-matched, so they blend in well.
